This is the second part of a two part series on the Thanksgiving Gratitude Garland. You can read the first part here.

Supplies
Supplies: I am hoping that with my printable packet you will not need to purchase much and just use what you have. The printable is on my Members Only page you can access by signing up for the newsletter on this site.
- Twine, Yarn, and or String –
- Printable OR Tags
- Acrylic Paint – 2-3 colors
- an old credit card, small piece of plastic or hard cardboard
- Water Color paints or ink spritzer
- Frog or Washi tape
- Pics
- Scissors
- Glue stick or double sided tape
OPTIONAL Materials
- Ribbon
- Scrap Fabric
- Silk Flowers, Leaves
- scrapbook paper
- Beads
- Stamps, stamp pads
- Ink
- Thick Black marker or White Chalk (marker) or both
- Regular black marker
- small clothes pins
Washi Tape

Washi Tape – glue pictures to the tag and outline with washi tape. I am sure most of you are way past this one, but some of us who are craft-challenged appreciate something simple.
Ink Spritz


I created an ink spray using a mini mister or spray bottle from the dollar store. I put a couple of drops of ink or add some watercolor to the bottle and then add a little water to reduce the concentration. I then just give the tag a few spritzes with a couple of different colors. Don’t get the tags too wet. Let them dry and then write your name on the tag. The colors will be very subtle, but this is ok, so it won’t take away from the name on the tag. One way to use this tag is to write a name on the front and then on the back, every year that person writes a gratitude on it. In my picture above I am making a mini garland for my friend.
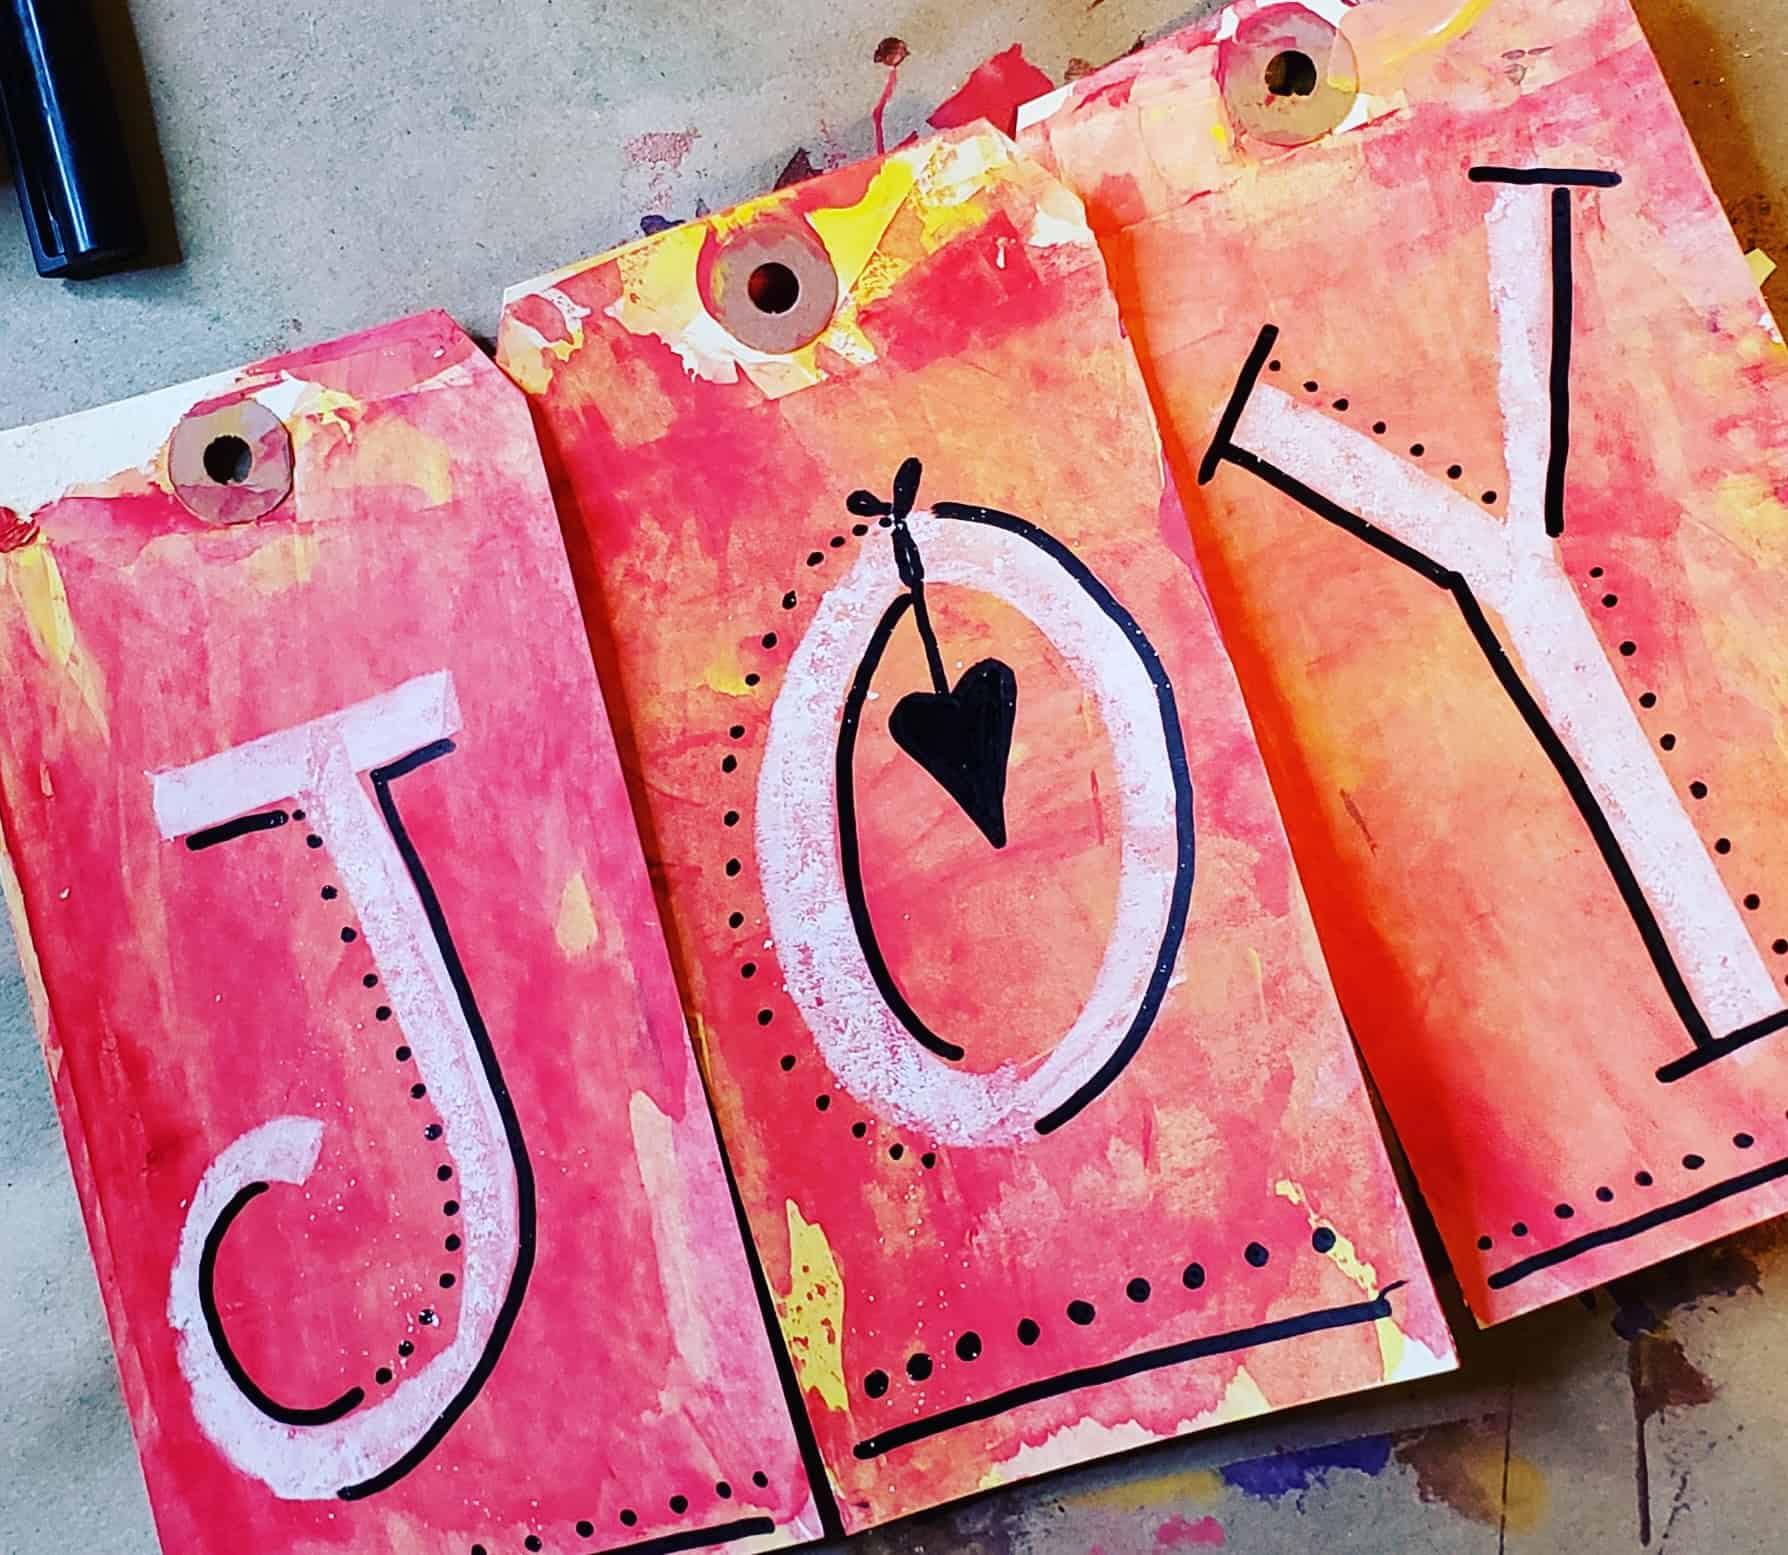
Paint Scrape Tags

This method is super easy. First decide on the word you are going to display – Thankful, Grateful or your last name. Gather enough tags for each letter in your word.
On your paper plate add three small dabs of paint side by side so they are touching each other so they make a line. Take the credit card and dip it into all three colors. Then take the paint and scrape in one direction and then dip again and scrape in another direction. Continue until you’re happy with the result. Keep the paint thin and not gloppy. It will dry quickly. It will arch up but will flatten out when it’s dry.
After it is dry use a bold marker or white chalk depending if your tag is light or dark and write your word in bold block letters. Attach the tags to your tags, hang your garland and sit back and count your blessings.
I can’t wait to see your garland. The third part of our challenge will be to find some practical uses for all those ICONS we did last week.
Leave a Reply